Monday, July 28, 2014

Winding Down On The Front Suspension.

    I finished removing the undercoating from the bumper brackets and shot them both with Rust Reformer. I may paint them glossy tomorrow if  I get bored. They would be fine as is.


    Once those where done I wire wheeled the back side of the bumper to remove the loose rust and shot it with reformer. I do not plan on keeping the old bumpers on the car but I hate rust and they will be used until I can budget new ones.


    That just about does it for the parts and areas for the suspension rebuild. now it is just a waiting game until the idler arm comes in. I did receive this with my last order ......

New turn signal switch!


    I installed it today, but I need to take it back off and make sure I am getting a ground to the column so that the internal indicator lights will work. I will not start hooking up wires until I get the car back on all fours. I do not want to be fooling around it too much while it is up on jack stands.
    I also received a bag of clips that hold the door handles and window cranks on. Someone installed  thin copper(?)  clips in a couple of them but they where not working. Now they are all secure.

    I had just enough time to clean up the garage and hose down and mop the floor. Oh, and I washed the car. I could not stands all of the dust on it from grinding on the parts.


Sunday, July 27, 2014

Here a Shock, There a Shock & a Few Odds & Ends.

   I want to start out with the sway bar bushings. In yesterdays post I stated that I thought they were too small. Well to put them on the sway bar you have to slice one side and slide them over. This takes up the extra space I was seeing on the sides. As far as the gap on the bottom, the cross member has a raised area that the bracket will straddle, taking up the space I was seeing there. I think they will fit just fine!


pic

    I started the day putting the passenger side brakes together. I thought I had a picture of the other side but I do not. Not much to see really. But, please note the new rubber plugs in the adjustment holes ;)


    Then I installed the shocks. I thought this would be a simple task without any cursing ..... I was wrong. Although I got it done, it was not as easy as I had anticipated. Connecting and bolting up the lower shock mount turned out to be a challenge. The old shocks were shot  so I never had trouble bolting up the lower shock mount. The new shocks needed to be compressed to get the nut on the lower shock mount and that was a chore! They look good though!


    After installing the shocks I decided to finish up the clean up on the double nuts (?) for the cross member install. They look pretty good. I think I will go tomorrow and see if I can find all new grade 8 bolts, nuts, and washers for this as well as for the sway bar.


Then I painted this.....  I wont give up the project just yet, but this will be a bitter sweet experience! Can you guess what it goes to?


    While that was drying, I tackled the bumper brackets. There was a ton of the factory undercoating on these and that was a pain to remove. I am slowly learning that I should just leave that stuff on and degrease and repaint! I already started the removal so I had to see it through to the end. I am almost there but still have some work to do before painting them. I also took the bumper bracket bolts out of the vinegar. They had been soaking since I removed the bumper.


    I left myself enough time before dinner to finish mowing and came back out after dinner and cleaned up the garage for tomorrow.

Saturday, July 26, 2014

Lay'n Frame ..... Paint.

    As much as I would like to put bags on and lay frame, I'm just laying paint on my frame ... sigh But I'm excited none the less! I actually thought I would have the suspension bolted back under the car by this evening but I remembered I can't put it back on until I have the idler arm installed. The big top bolt on the idler arm won't go in or out of the hole once the cross member is bolted up because of the motor mount.

    I painted and put the driver's side brakes back on the backing plate. I left the inside Rust reformer (flat black) and the outside got the glossy .....


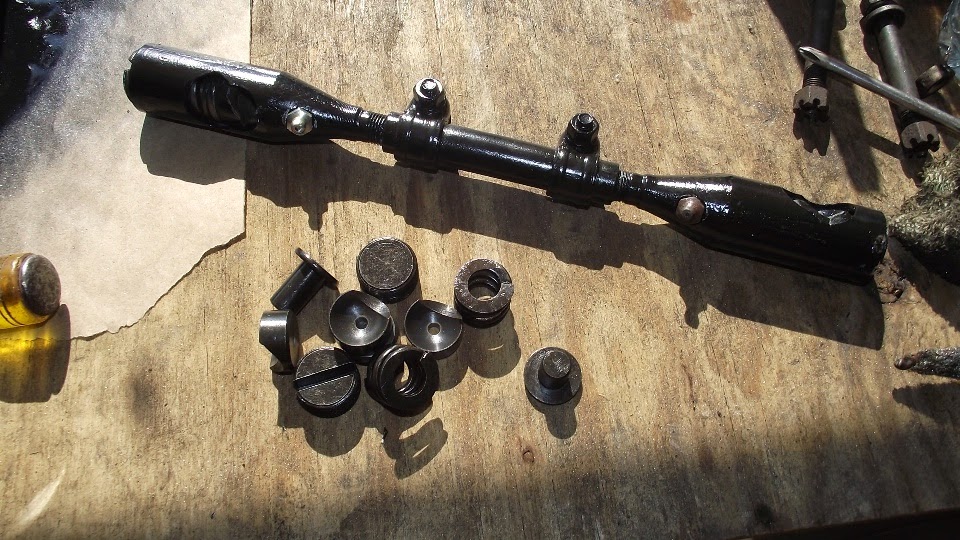
Some new rubber plugs!

 and moved over to the passenger side. I took those apart and wire wheeled and painted the backing plate.


Then I started cleaning up the brake parts for the passenger side. The adjustment caps came out real nice once they soaked in the vinegar for a while. I just had to wipe them out and wash them.....


Brakes are just laying on the backing plate in this photo.


    Once that was done I masked off and painted the frame and radiator support. I shot rust reformer on first and then the glossy. I left the wheel well the flat black.


I seem some rust holes that will need attention down the road!


    When I was shooting the last of it, the mailman pops in with a package! That was fast .. I got my shocks in and the drag link rebuild kit.
    I also got the sway bar bushings but they appear to be too small. I am going to have to look into this.
EDIT: After slitting he bushing to slide over the sway bar it takes up the space pretty good. and there is is a hump where the mount goes to take up the remaining slack. I think it's gonna be fine.


    I immediately took the shocks out , scuffed the pretty black paint and shot them a new color! These shocks and the drum springs should be all that sees the blue. I just wanted a hint here and there. In reality the shock will be the only thing anyone will see since the hub is covered by the tire.


While the shocks dried, I rebuilt the drag link. Nothing to this really, took about 5 mins, if that.  You just unscrew the ends and dump the old parts out then put the new ones in and cap off the ends with the new caps. The first photos are the old cups. You can see the pitting ....


    Here is the new stuff ...

The new cups do not have the grease channel in them like the originals, I guess they are not really needed.


    And installed ...

I would have been nice if the kit included the square rubber grease boot, new grease fittings and cotter pins.

    Tomorrow I will put the brakes back together and install the shocks.

Friday, July 25, 2014

Just Tedious Cleaning

    Nothing too exciting. Mostly wire wheeled a bunch of stuff to prepare the wheel wells for paint. I did paint the drum springs and put those back on. If you have ever tried to put these on you know it is a PITA.!  The problem is the spring is very tight. if you start one section and start pulling on another the first section pops off. I actually got one drum done by tying a string to a screw in my table, then tying the other end to the spring to hold it down while I worked the rest of the spring on. Even this was a challenge! Well after trying several methods I finally had the light bulb go off. If you turn them face down and put the spring over the drum lip then work it on with a big screw driver (like installing a tire on a rim) it goes right on! DOH! At any rate my attempts will cause me to have to touch up the paint.

    Not too bad. A little fun with color.


    I started on the frame rails with the wire wheel on my grinder.


    Then I took the brake assembly off of the backing plate and wire wheeled that as well as clean up the parts. I put the wheel cylinder caps (?) in the vinegar to remove some of the rust that had accumulated inside the caps. Nothing bad but hard to get at.


    Then I went back to the frame rail with my Dremel and hit the tight spots the wire wheel was to big to reach. After that I washed everything with soapy water. I have not done anything with the sheet metal in the wheel wells yet. My plan is to degrease and put on a coat of under coating. (that's what's there now).


    The poor car is getting dusty and itching to be back on all four tires!