Friday, June 27, 2014

A lil Paint and some PB Blaster!

Go the sway bar and brackets painted.


Wile waiting for that to dry did a little wire wheel on the cross member. It looks a lot better!


I got another half pound of crud off her.


I also took the other parts out of the vinegar soak and hit them with a wire brush to finish them up.


Then I painted those too.


I did not paint these bolts but they are looking good!


The last thing this evening was to soak all of the bolts in PB blaster to help loosen them for when I start the rebuild.


Thursday, June 26, 2014

Sway Bar or It's a Start or Just a Sway'n

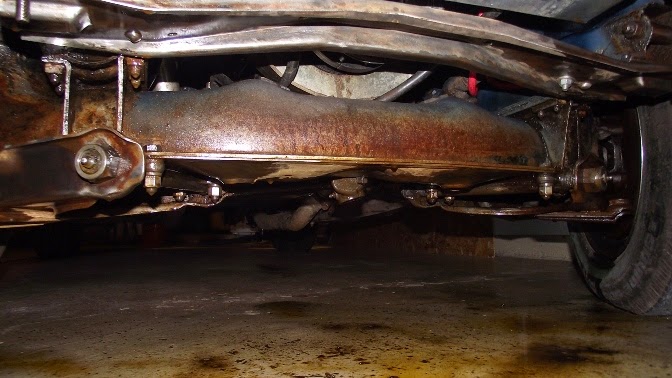
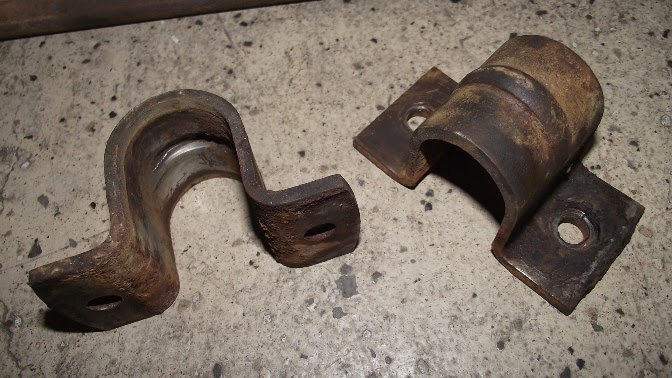
    Today I took the sway bar off the car and cleaned up the bar, bushing brackets and stabilizer linkage rods. Well actually the kit will come with the stabilizer linkage components so I only did the bar and brackets that hold it to the car. I put everything else in a vinegar soak to clean up and possibly sell. Once I finished the brackets I put those in the soak as well to get the parts I could not reach with the wire wheel. I used a hand brush first, but that didn't do much.  Here are the parts. Note all of the bushings are shot!


    Here is the soak.. Note If your threads on a bolt are pretty bad you may want to avoid this method if you plan to re-use the bolt. The vinegar can eat the threads too badly to be useable. Note mine are sticking out in this picture. They were not bad but I did not want to chance messing them up.


    For those that do not know, the acid in the vinegar dissolves the rust. The longer you leave it the more it removes. For badly rusted parts you have to be careful or the part will dissolve away. Of coarse if it's that bad you should probably find a replacement. Here are the parts I did with the wire wheel ...


    The bushings for the sway bar are in bad shape and I have not decided on a source for those yet. I hope the place that has the kit will also have these bushings. The site list a few different ones but none state they are for a 50 Chevy.


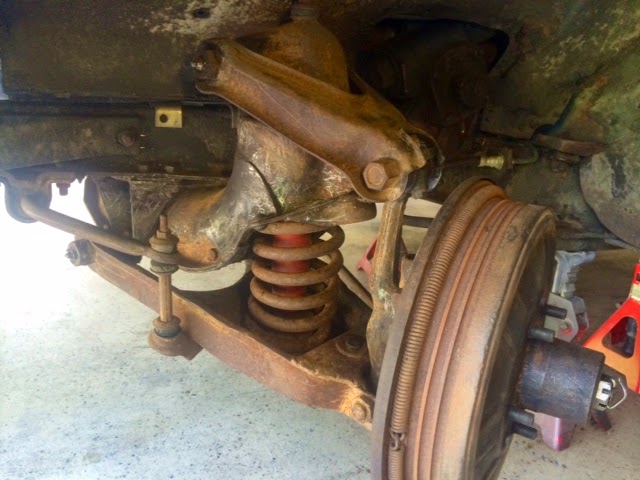
    I'll clean up this with a wire wheel and paint it before putting it back together.


    I am running out of time before my vacation but I shoud be able to get the parts painted before I leave as well as the cross member that holds the sway bar.

Tuesday, June 24, 2014

Shock Mount Repair

   EDIT: July 16 2014 - The other side was missing the end all together so I just ordered 2 new ones when I ordered the suspension rebuild kit from The Filling Station.

 When I drove the car home from the transmission shop I noticed a clunking. I found that the lower shock mount on the passenger side was broke. So I tool it off and welded it back together ( the tab that broke was retained under the bolt that holds it to the front suspension).


    I also cleaned up the nuts and washers and soaked them in vinegar over night (dissolves rust) to finish them off. I shot them with black satin paint this morning and set them aside to dry.


While they were drying I cleaned (scraped and wire brushed) some more on the  suspension parts. I removed another pound of crud!


    Finished up all I had time for and installed the shock mount back on the car.


    Looks like a lot of pressure is exerted to the end of the mount as the car dips for a bump or pothole. It also looks like my weld may have gave way on the left. I will look at it tomorrow and see. I rushed a bit so I may have to pay for that by welding it over LOL


    That brings this blog up to date with the work that has been done so far. If I left anything out I will update accordingly.

Front Suspension Clean Up and Evaluation

     I knew the front end was loose by driving it around my neighbor hood, I really found out how loose when I drove it to the transmission shop! There is at least 8 inches of slop in the steering wheel and I had to really pay attention to keep it in its lane.

    So once I got it back home I jacked it up and took a look around.This is by far the worst part of the car that I have found so far. This is what I found ....


And after some cleaning ....


I ended up with 12 pounds of greasy dirt! Yes I weighed it! HA!

   
After the clean up it actually felt much better to drive around the neighborhood but will obviously need attention. I am going out of town soon and did not want parts sitting out while I'm not home so I will wait until I get back home to order. I am going to get a rebuild kit and have the idler arm rebuilt. I think I can do the rebuild from what I have read. I will have to just take my time and get help if I need to. I just hope I don't wring of bolts or break parts .. that's never fun LOL So in the meantime I will start soaking stuff in PB blaster or WD-40 and doing odds and ends.