Tuesday, March 31, 2015

Windshield Seal Day Three:It could be worse.

   It could be worse... I could have broke my glass.....


The place I ordered my seal from sent me the seal for a sedan. The sedan coupe hardtop etc have taller windshields than the Fleetline. Some kind of mix up on their end as I did order the correct part. I ordered a new one while they sort out a refund. GRRRRR I suspect it will arrive day after tomorrow. For now I am dead in the water since they also have my window felt and vent window rubber on back order.


For your viewing pleasure....


I guess the guys in the Fleetlines back in the day took their hats off    HA

Monday, March 30, 2015

Windshield Seal Day Two:Prep & Paint

    Shot Rust Reformer on the area then painted Cobalt Metallic. I did not want to end up with exposed grungy edges like the rear. This paint will blend in nicely with the cars paint.


I also used Rust Reformer on the wiper components and center trim brace.


Worked on the dent in the driver side lower windshield trim...


Before:


After:


    I have the sealant arriving tomorrow as well as the wiper tower gaskets. I should get it all back in tomorrow or the next day depending on what time the shipment arrives. The wiper tower gaskets are coming from another location so that will be a few days. For 8 bucks, now is the time to replace those as well.

Sunday, March 29, 2015

Windshield Seal Day One

    I got started on the windshield removal toady to prepare for the new seal. Let's say this is even more fun that the rear glass. Overall it would have been a n easy job except for those stubborn 65 year old screw not wanting to come out! But I overcame disaster with patience... and cussing and stomping and more cussing.

The worst of the culprits were one screw on the lower trim just inside the door on the drivers side. A screw on the bottom inside center bar and the screw holding the molding structure outside, center.

Once those were out ... no worries... other than crud and dirt.

I will give some information if you are doing this and have read the manual.... The center bar has a weird nut disguised itself as a screw head holding that together. The very bottom one on the inside will require a short screw driver. I had trouble and had to cut out the rubber seal to allow me to access the head with pliers to turn it. The plate on the outside center has a cylinder with a screw sticking out the bottom and a Phillips head on the opposite side holding the chrome trim plate. This plate holds the two ends of the bottom chrome. I had trouble with the head of this as well but after lots of WD-40 and the right screwdriver got it to break loose. The bottom chrome also has a screw on each end. You have to open the door to get to those.

You will also need to remove the wiper arms and assemblies. There is one nut under the dash for each. Once you remove the nuts you can twist and maneuver the arms out. This will allow you to remove the bottom chrome pieces. I used the wood end of a hammer against the chrome and hit it with another hammer to tap them off. I opened each door to keep the trim from running into the doors.

Once you cut the old seal from the inside you just push out seal window and top trim all as one unit.

I masked off and wire wheeled the area to prepare it for a rust reformer and paint.

Here are the pictures from today....


Had to drop the glove compartment to reach the windshield wiper nut.

Saturday, March 28, 2015

New Rear Glass Seal

    I noticed early on that my back window leaked whenever I washed the car. Not jsut a little, but a lot. I knew it would just be a matter of time before I would replace it. That time has come.

    I learned a few do's and don'ts  along the way but overall it was manageable.

The best way to approach it is to read the manual. Here is a link....

REAR GLASS INSTRUCTION

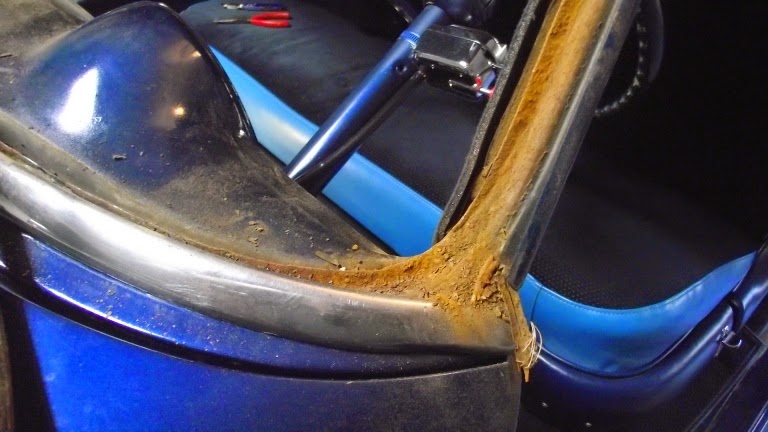
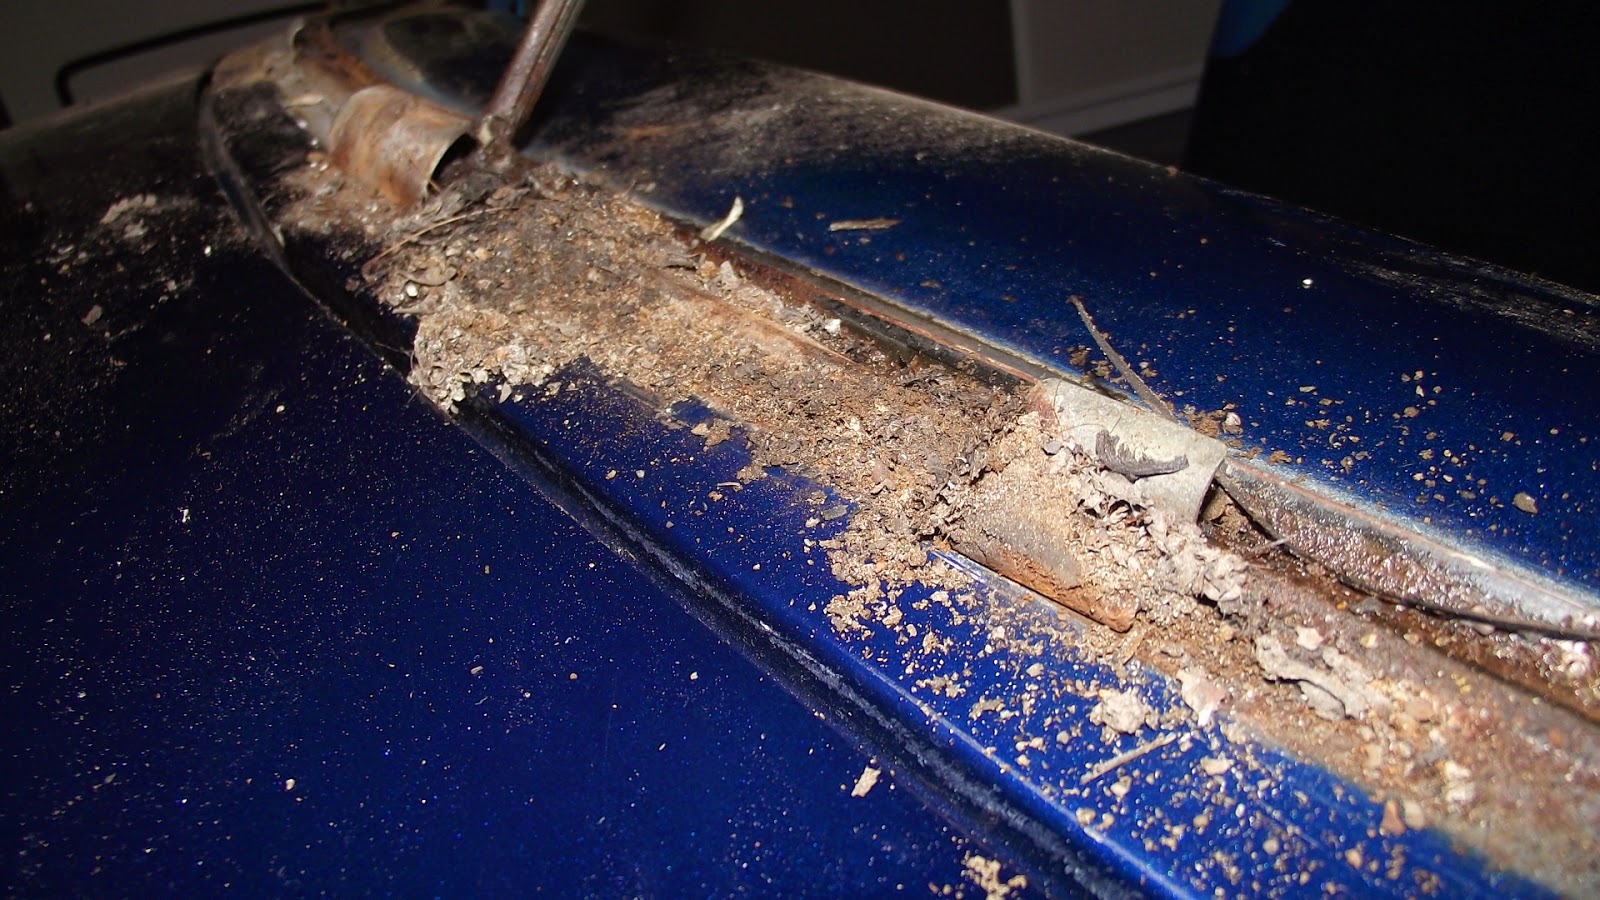
    The first thing I did not do and should have is to remove the rubber, glass and chrome trim all as one unit. The trim came off with some coaxing but I dented my panel below the glass a bit. I did not realize I was doing it until it was too late.

THIS IS NOT HOW YOU DO IT!


    Once I discovered that it was happening I started prying up from the glass side of the trim. You risk breaking the glass doing it this way and I got lucky as far as that goes.
   
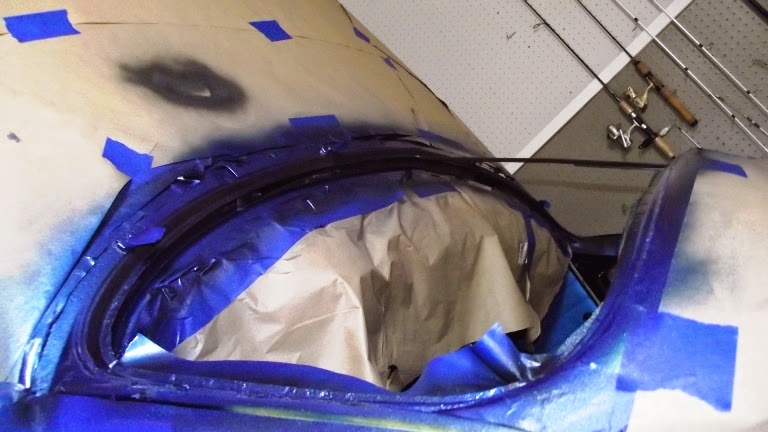
    If you are replacing the seal then just cut it from the inside and pop the whole thing out. Take it all apart once it is off the car. If you are just replacing the glass then you will have to maneuver the rubber over the pinch weld and work the whole thing out that way by pushing from the inside. Once that is done clean the pinch weld of any old sealant and address any rust. I was lucky and did not have any rust.


    To my defense, the seal came with instructions and I tried to use those to do it. My instructions did not tell me the chrome had to be installed onto the rubber before installing the glass and seal onto the car. I found out real fast that the trim wasn't going back in that way. I had to pull the glass back out and do it right.


    This in itself is a tricky procedure. I tried installing the trim into the seal then onto the glass... that did not work so well for me. I installed the rubber then the trim. I soaped all the channels to allow things to slip around easier.

    Once i got it all back together I placed the rope (see instructions) around the seal and placed it onto the car. I had someone on the outside pushing on the glass while I pulled the rope on the inside to work the rubber lip over t he pinch weld.


    The new seal does not fill the gap like the original one but other than that it keeps out water and that is the goal. I will have to address the color difference of the now exposed surface. I have just the color to do it. If you have been reading the blog you saw I have been using the blue on lots of the projects up to this point.


    Once I had that in I took it out side and ran the hose on it at pressure and no leaks! I will be putting the sealant under the lip of the seal once the shipment arrives.

    I did not feel like taking the windshield apart today so I started removing door panels to prepare for replacing he felt channels and vent window rubber. I have only received half the order so tomorrow I will probably work on the windshield. It should go smoothly. The channels in the doors and back side glass do not look like a easy job! I'm not looking forward to it!