Saturday, January 31, 2015

Brake Lines, Drums, & Paint... Oh My!

    Yesterday I went to my local NAPA and picked up some break lines. I wanted a 40 inch and a 20 inch but they did not have a twenty, 18, 0r 16. What they had was a twelve. GRRRR So I got the 12, 60, 40, and a 30. I figured with the 4 sizes I could make something work. Nope, All of the combinations still didn't match up the way I liked. Well after running the 40 on the driver side and over the pumpkin I measured out and determined the best fit on the passenger side would be an 18, possibly a 16.
    So, today I went to my local Advanced and they did not have a 18 or 16 either. The closest they could do was a 20. .. ok I got it and tried it out.


    I do not like the humps I had to make to get it to fit so I will head out tomorrow and look for the 18. If I can not find one I will just order it online and wait. Here is what I have so far...


    The exhaust is in the way af just about everything... I am seriously thinking about moving them back and having them shoot out in front of the rear tires like in the photos below... not necessarily this pipe style...
.


    Oh, here is a comparison of the ones that where on the car and the new ones. The new one in this photo is the longest line I decided not to use. I would have needed something like a 6 inch mating up to it.


    I think you can see why I wanted to replace them.  SMH  Whoever did this obviously bent them by hand. You can get a bending tool for a few dollars at most parts stores.. geeze ...


    In between bending and fitting brake line I was also painting the Drums. First I painted them with Rust Reformer by Rustoleum. Then they got a good coat of glossy black.


    Someone at least replaced the brakes and wheel cylinders. I was going to remove all of this and remove the rust from the rusty bits and paint it all but decided to wait and do that as it's own project down the road..


     I still need to come up with a couple brackets to hold the lines in place but that will not be an issue.

Thursday, January 29, 2015

The Rear: Paint & Rust

    I got the rear painted and bolted back under the car. I painted and used the old shock hangers and they seem to be ok. I will have to watch them close for a while to make sure. I wont know if I have any clearance issues with the exhaust until the car is back on tires.


I also disconnected the mangled brake lines so that I can get new ones ran a bit neater.


Once I got that taken care of I started cleaning up the hubs. I noticed I have two different ones! Maybe one is an after market or at the least a replacement from a different car/truck than the other side.


The list...

     1.  I will cut off the original spring pads and grind the area smooth.
     2.  Locate the mounting position for the new pads. 5-7/16" from brake backing plate
     3. Mount the springs onto the axle in approximate location
     4. Grind off original driver side spring hangers
     5. Put it all back under the car and mark the new hanger locations
     6. Mark and drill new holes for the hangers and install.
     7. Check and adjust for proper pinion angle
     7.2 Adjust the rear for center (side to side)  
     8. Once in position, spot weld the spring pads.      
     9. Remove rear and springs for permanent welds
     9.2 Find a welder - weld perches up EDIT: By this I mean a person qualified to do it not find a machine.
    10. Clean and paint
    11. Mount rear to car.

Tuesday, January 27, 2015

Short & Sweet - Nice & Neat

 Long story short.... took the rear outside and wire wheeled it for a while ....


I also did the old bottom shock hangers....


It will probably be like this the next few post... I may even skip some post since it will basically be the same ... prep. Once I paint I will post up.

Monday, January 26, 2015

Spring Perches Welded On

    I called a local "mobile welder" I found online and he came out around noon and welded up the spring perches. Once he left I wanted to take the axle outside and start wire brushing it but it was too cold for me. I messed around a bit scrapping off some of the grime. maybe I will brave the cold tomorrow. The sad thing is, guys in the north would love to be out in Georgia weather right now!


The list...

     1.  I will cut off the original spring pads and grind the area smooth.
     2.  Locate the mounting position for the new pads. 5-7/16" from brake backing plate
     3. Mount the springs onto the axle in approximate location
     4. Grind off original driver side spring hangers
     5. Put it all back under the car and mark the new hanger locations
     6. Mark and drill new holes for the hangers and install.
     7. Check and adjust for proper pinion angle
     7.2 Adjust the rear for center (side to side)   
     8. Once in position, spot weld the spring pads.      
     9. Remove rear and springs for permanent welds
     9.2 Find a welder - weld perches up EDIT: By this I mean a person qualified to do it not find a machine.
    10. Clean and paint
    11. Mount rear to car.

In addition to this  ...

Replace mangled rear brake lines
Tidy up the fuel pump wiring
Paint and or undercoat areas that will be hard to get at with the rear in
Possibly paint the drive shaft since it's disconnected

Sunday, January 25, 2015

Adjust, Glue & Tear Down

    I jacked the car back up today and adjusted the rear from side to side. I would say it's pretty close. Now to see if it stays that way once I put it back. Once I had that, I took the tires off and  prepped the spring perches for tack welds.

Ready to super glue!

My makeshift spark deflector! That gas tank makes me nervous!


    I just hit them on all four corners and called it good. Now to find someone to professionally weld them on because you can see in these pictures I nee a lot more practice!


    Then I unbolted the the drive shaft, U-bolts and then the rear hangers. Dropped down the springs and eased the rear out with the floor jack and put it up on stands out of the way.


The list....

     1.  I will cut off the original spring pads and grind the area smooth.
     2.  Locate the mounting position for the new pads. 5-7/16" from brake backing plate
     3. Mount the springs onto the axle in approximate location
     4. Grind off original driver side spring hangers
     5. Put it all back under the car and mark the new hanger locations
     6. Mark and drill new holes for the hangers and install.
     7. Check and adjust for proper pinion angle
     7.2 Adjust the rear for center (side to side)      
     8. Once in position, spot weld the spring pads.      
     9. Remove rear and springs for permanent welds
     9.2 Find a welder
    10. Clean and paint
    11. Mount rear to car.

    I will also need to decide how I want to mount the shocks. The kit should have came with a mounting kit .... The original shock position is too far forward to hit the mounting holes on the spring bottom brackets. I may use the old mounts and see how they do. If they do not work I will probably just make an upper mount and switch out the shocks to ones that have eyes on each end. The originals only have a stud on top that goes up through the car floor.


Saturday, January 24, 2015

Day 7: Adjustments or Up, Down, Up, Down, Repeat.

    I started the day getting all of the bolts in the bracket holes so I could hang the springs. One thing I had never thought about with a bolt on kit was access to the holes! The two inner holes on each rear bracket had obstacles. On the driver side it was not too bad as there was a small gap I could just fit a finger in to maneuver the bolts in the holes.
    The passenger side was another story since the frame rail sits right against the spare tire well. I did the front bolt first so nothing would block the path to the hole. I tied a thread to a zip tie and fished the thread up and out. From there I took the zip tie off and tied the thread to the tip of the bolt. I then pulled the bolt along the rail to the hole and helped it stand up with screwdriver. I stood it up but it did not want to drop down. I got my pry bar and gently placed it on top of the bolt and pushed it through. It worked a lot better than I had hoped. I held it down while starting the nut. Then I fished the wrench in and held the top while tightening up the nut.
    For the next hole I used a pair of fishing pliers and maneuvered the bolt over the hole and it dropped right in.


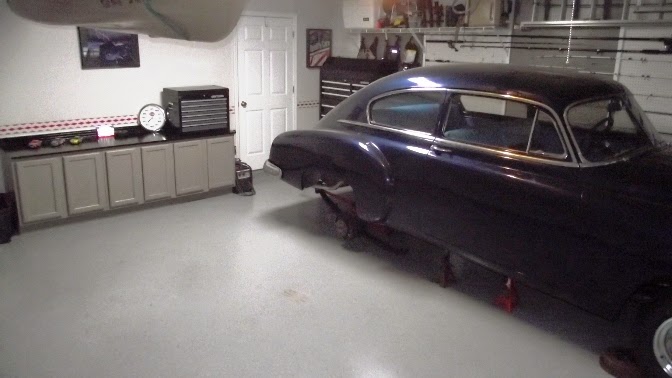
Once everything was tight I bolted the springs and rear back up and put the tires on. Once the tires were on I could let the car back down on it's own weight to check the pinion angle. Looks to be right on the money. Optimal is 3°, 3-6 is acceptable. If your pinion angle is too great the car WILL let you know once you get it up to speed!


    Now to check the rear for center. I was off to one side 3/8 of and inch so I needed to push the rear over 3/16ths. Easy right? I jacked it back up on stands and moved the jack around from the side to hold the front of the rear up to protect my pinion angle. If I did not do this, when I loosen the U-bolts the weight of the end would have twisted the rear on the perches. Once i had that secure I removed the tires again and measured out where I needed to be and used a 2x4 and a hammer to tap it to my mark. Put the tires back on an let it back down.
    I'm not sure what happened but the only thing I accomplished was to move the offset to the opposite side LOL .. I will try again tomorrow. This time I will leave the tires on wheel I do it so I can take measurements while moving the rear around.


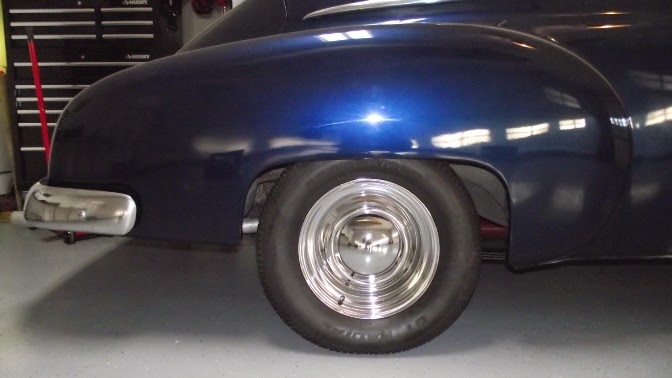
    The tricky part with this is there really isn't a reliable reference point. even the lip of the wheel well I am using could be off from the opposite side. My goal is to have about the same distance between the tire and the inner wall of the well. It's a tight fit as is and even a couple 16ths could cause a rub issue. I am leaning towards thinner tires to cut that issue out all together.

    One thing I can see is these springs did not make much of a difference in the height of the car. Normally this kit would lower it about 3 inches. I do understand it will settle in after a while but the old weak springs let it sit low already. f those would have been good then I'm sure the car would have sit much higher allowing a more noticeable drop. I can live with it. I can't afford to lower the right way with air bags so I would rather run it high than to do it blocks and cutting coils etc.
Not the best picture for this but this is before.

After - It may sit higher HA! But it will drop some with time.


Here's my updated list...

     1.  I will cut off the original spring pads and grind the area smooth.
     2.  Locate the mounting position for the new pads. 5-7/16" from brake backing plate
     3. Mount the springs onto the axle in approximate location
     4. Grind off original driver side spring hangers
     5. Put it all back under the car and mark the new hanger locations
     6. Mark and drill new holes for the hangers and install.
     7. Check and adjust for proper pinion angle
     7.2 Adjust the rear for center (side to side)
     8. Once in position, spot weld the spring pads.
     9. Remove rear and springs for permanent welds
    10. Clean and paint
    11. Mount rear to car.
   

Friday, January 23, 2015

Day 6: Drilling Holes!

    Ok, I was not looking forward to day 6! I knew I had 16 holes to drill and I knew it would not be easy.
Picture laying on cold concrete trying  to put pressure on a drill to go through hardened steel! Not fun at all.

    I got a little excited and burned out the drill bit I had so I had to go buy another. I picked up a really good bit for hardened steel and a few others just in case.

    Drilled out the 16 holes to mount the hangers and that's about it. It took some time and elbow grease but I got it. Tomorrow I hope to re mount the springs and work on the pinion angle.

Had to turn the front bolts opposite because a body mount was in the way!


     I had to unbolt and drop the rear shackles to get to the bolts so I could remount just the shackles. I could not get to the inner shackle bolts wit the spring mounted up.


         Some of the best investments you can make! One battery charge took out all 16 holes!


        Save your drill bits and get some of this! A shot of lube will keep your drill bit from getting hot and going dull!


     I hope to remount everything tomorrow and try and set the pinion angle. After that, ... clean up the rear and paint the axle. I will still need to find a professional welder for the spring perches. I could do it but I fear it would be a mess LOL