Tuesday, May 17, 2016

SOLD

Well I sold the Fleetline and forgot to come back here and post it. Thanks for all of the interest and check out my other blogs!

1935 Ford Pickup

Damon Outdoors


Thursday, May 14, 2015

Trans Mount & Engine Seal

    Nothing too major going on but I finally replaced the transmission mounting pad.


    I also have had an oil leak so I started wit the valve cover gaskets. I went with Fel-Pro Molded gaskets. They had great reviews so I hope they don't leak.  If that was not the problem I will have to look at the oil gage connection or the distributor O ring. I will know more once I drive it some.


    The new gaskets did not allow the short bolts to go in easily so I ran out and got studs. The only thing my part store had were Mr. Gasket brand. They look ok but the "caps/wings" would not seat. They just kind of flop around on top of the stud. I put a dab of silicon glue on each one before placing the cap on to hold it until I find something better. I may just go back to a plain bolt.


    I have a new small project in the works so check back!

Sunday, April 12, 2015

And all the Trimmings!

I put all of the glass and trim back on the front doors. When the vent window rubber seals come I will blow it back apart....


    After I got it all together I took her for a ride. With the windows up, a much quieter ride! Also. when I shut the doors its sounds like new money! MMMmmm I also washed the car and saw no leaks ! sweet!

What next!!

Saturday, April 11, 2015

A Couple More Days Of Windows

   Friday I started taking the passenger side door apart while I was waiting on my windshield seal to show up. It was fairly uneventful until I go to the door handle! This handle is shaped a little different on the underside where the retaining clip resides. My tool would not catch the ends to pop it off. I finally got it to come loose, but what a bear!


    This side was missing some screws and the bottom adjustment for the divider was not screwed into the bar.


Then the seal came so I stopped and focused on that.

    I have to say I was pretty disappointed in the quality of the seal. If I had not handles the two from Ecklers that were for a coupe I would not have had anything to compare it to. I got this one from Chevy's of the 40's. It came loose in the box with no manufacturer packaging. It had a solid center section. By this I mean none of the holes where drilled for the center bar! Also the rubber just felt flimsy. Kind of soft. It did not seem to fit the glass tight and I tore a section. putting it over the pinch weld. pulling my rope out. It seemed way too easy for the pressure I was applying.  I was very disappointed but I got the windshield back on. We will see how it holds up.


    I finished up today (Saturday) by installing the center bar. It was not easy drilling the rubber to line up with the outside and inside holes. Also I was missing a retaining nut so I will have to see if I can order one.

   Then I sealed it all up with the 3M and installed the trim and wiper parts and seals. I cleaned up the excess sealer with WD-40 and then cleaned the glass with Windex.


Then I cut and installed all of the whiskers and new channel.


I attempted to install the new glove compartment light before installing the box itself. I ordered one for my car but it can labeled newer Chevy's. It would not fit in the hole. I filed down the housing and got it in then the housing separated from the flat disk that holds it to the dash. I threw it away and installed the glove box. SMH ... even if it would have fit it was a total piece of crap. BTW, I got that from Eckler's. Total waste of time and money.

I went back to taking the passenger side door apart. Got it apart and disassembled the divider bar. Then I wire wheeled all of the parts as well as the bottom window channel and painted them with Rust Reformer.


I also painted the inner trim with he blue paint and put the divider bar back together. back together


    Tomorrow I will put it all back in. I will also put the driver side vent and divider back since Eckler's has not responded to my email about the back ordered seals. SMH They did not refund my money for the wrong windshield seals yet either. Yeah, take your time, it's just MY money.

Thursday, April 9, 2015

Day Two: Déjà vu Rear Side Number Two

    More of the same... Shot the parts with Rust Reformer and cleaned up the glass.

    Then I formed the channel over the glass and cut off the excess. If you are doing this, you will want ot work slow. The channel will want to curl in the opposite direction of your bend and you will want to work it out as you go. The channel will start to slide on the outer stainless beads and straighten on up. Be sure you leave or measure a little extra to allow for this. One strip is plenty to do a window so leave a good amount on each end if your not comfortable.


    Once everything was dry and ready to go I put some glue onto and then installed the two short channels into the opening onto their clips.These are what the ends of your new felt channel ends rest in. The top did not have screws on this side so I left them as they were. After that I lubed everything well and worked the mechanism up and down. Then I slid the bar onto the regulator that the window bolts to and lubed it as well.


    After that I ran glue around the opening and put the formed channel in place.  Then the fun begins.

    This one was a little harder than the other side but it eventually went. I had to really apply force to the ends as I went but it did not break! You will think how the heck did this come out or how will it ever go back in but there is a sweet spot. Don't forget you will have to pry back one section of channel on the front side to insert the edge of the glass. Once it is all in shape it back and work any other sections that need attention then bolt in the glass and roll the window up to hold it in place until the glue dries.


    While that was drying I put the panel and garnish molding back in place and installed the seat.


    One thing is no matter how good or bad a job you do, it will always be better than the rusted decaying crap you had to begin with. And now you will have the confidence to do it again if the need arises. Mine came out presentable.


    I probably had time to tear down the passenger side door but I really want to make sure there are no issues with the other side first. Also, I.did not want to have that half finished when the windshield seal comes tomorrow! I hope it comes early!

    Now if  Eckler's would jsut send those vent window seals that are on back order!!!


Wednesday, April 8, 2015

Déjà vu Rear Side Number Two

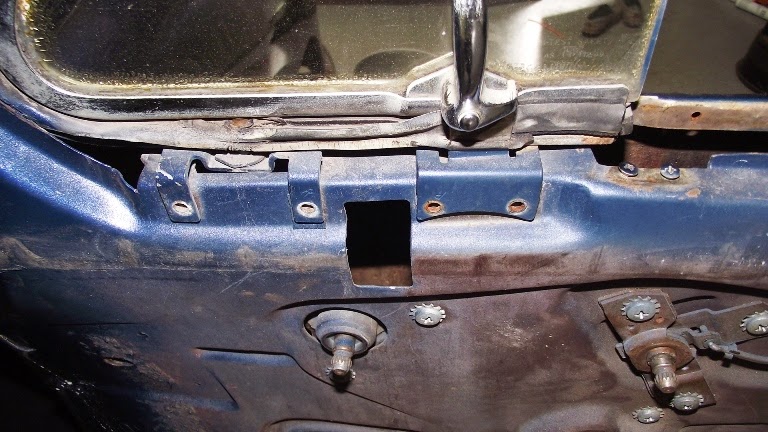
    I removed the glass from the rear passenger side today as well as all the old channel and whisker strips.


    I will get the glass cleaned of dirt and paint over spray before putting it back. The glass you see under the side glass is the windshield.


    Don't forget the two little screws at each end of the whisker strip on the body. You can try and drill little holes in the new ones if you want. I tried and saw a disaster in the making so I stopped and put it out of mind!


        The drain hose seems to be OK on this side. 


        And another patch panel. I am glad they at least put in panels rather than a bunch of Bondo.


    I dare not strip this down to repaint. I would end up with an un-drivable project. But believe me, it's killing me! LOL


    I blew out he window "tub" and this is a small taste of what came out! 


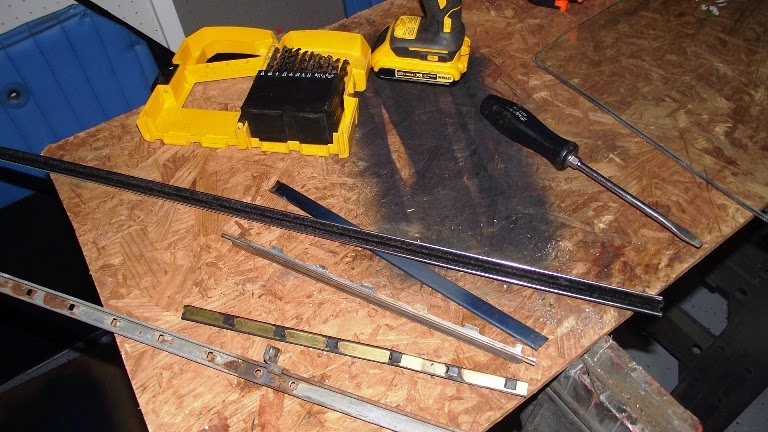
    The brown truck came today!  I should have ordered this months ago!


    If I did this often I would have to come up with a jig to hold the felt strips tight to the car while the glue dries! Or, better yet, get a staple gun that would go through the strips as well as the panel as original!

    If you find yourself doing this job, plan out a way to hold it tight prior to the glue. I used what I had , then rotated around with my hands to make sure spots where firm to the car. The 3M trim glue dries fairly fast.


    The trim molding is a little better to manage. You can just be sure he ends are secure and place a board and weight on in between. Be sure you have it lined up correctly and it stays while placing the weight on!


    I have two parts soaking in vinegar tonight and still need to lean up the glass mechanism parts and spray them with Rust Reformer. I should have it back together by tomorrow night with new channel installed.


Inserting these pics to use elsewhere....