Friday, July 18, 2014

Back in Biz-ness

... Set out early this morning and picked up another grinder. Got back and went to work on the remaining parts.I'm not sure what else I can add except ya better wear gloves while grinding... took mine off for a minute and promptly wire wheeled my thumb .. ouch!

Before...


After...


    Wow The camera really brings out the spots you could not get to with the grinder!

    I also took the parts out of the vinegar to see how they where doing... not to bad...


  The springs will havet o go back in but I put the lower A arms back in to gett he parts I could not reach with the grinder.


    I hit the drum springs with the grinder too .. got my thumb while doing these! The one time I take my gloves off ... figures!


    Here are the picures I left out yesterday of the passenger side wheel well...


Some nice black paint under the flaking undercoating!


Thursday, July 17, 2014

Spindle Stew

    Well today turned out to pretty much be a bust. I had to go to The home depot to get a couple new wire wheels for my grinder and do some other shopping. It was late by the time I got started. About 5 minutes into it my grinder bit the dust.


    I also went to Wall-mart and picked up 5 gallons of vinegar to soak a few parts. I have the springs for the drums in there as well as the uprights, upper A arms, various other parts, and the coil springs. Most of the rust should be gone in a few days. Here is a shot of my spindle stew ...


    Last night I started cleaning up the frame in the passenger wheel well but I did not get any pictures yet. I did not finish in there because my wire wheel got to small to work with. I want to clean up and paint everything I can before I fill the space back up with suspension parts!

Wednesday, July 16, 2014

Breaking Down The Spindle

    After some research I decided it was time to break down the spindles. I envisioned all sorts of problems, mainly tearing stuff up beating on it with a hammer!

    This pretty much never came about. I started with the king pin locking pins. I learned these are tapered and need to be tapped out from the threaded side. I removed the nut and lockwasher then put the nut back on until it was flush with the top of the pin. This prevented any mushrooming.. It took some pretty good blows but it was moving. I have been shooting all of the trouble areas since before day 1 with PB Blaster to prepare for this. I think it has helped. Back to the pin ... Once the nut bottomed out I backed the nut off half way, then screwed a bolt in the exposed threads and continued with the hammer. Once I bottomed that out it was moving well enough to remove the nut all together and tap it the rest of the way with out damage.


    Once that was done I removed the grease fittings and the top cap (bottom does not get one). If you see the retaining clip on top of yours the cap is missing. A screwdriver with a thin blade takes this off easily. Needle nose pliers and the same screw driver removed the retaining clips. It seemed only one side of the clip would move while squeezing with the needle nose pliers so I had to work the screw driver behind this side and work it up and out.
    Next the dust covers.There are two of these per spindle, one top, one bottom. These proved to be a bit more difficult to remove. I found the best way was to drill a small hole in the top cover and screw a self tapping screw into that to help lift it out. The bottom did not seem to work as well. The bit would walk on the king pin once it started through the cap and enlarge the hole. There was nothing for a screw to grab on to. I ended up just letting these come out while driving the king pin out.
    I did just that, drove the king pin out with a piece of round stock I had laying around. I started out carefully to make sure I didn't mess up the pin and cause it to bind. It came out easily once the dust cap popped out. Even the bushing came out with ease. I read lots of articles that stated the early models may have to be pressed out but none stated what year that was, other years "float" I guess mine "float" cause this was easy!


    The worst thing I ran into(besides the difficulty or the dust covers) was the thrust bearing and shim fell out when the pin cleared them and I was not real sure how they were in there and in what order. Of course I knew where the bearing went just not sure which side was up. I latter learned the shim goes on the opposite side of the bearing. I learned about the bearing on the next spindle but promptly forgot again once I was done  HA I am sure I can get all this info online.
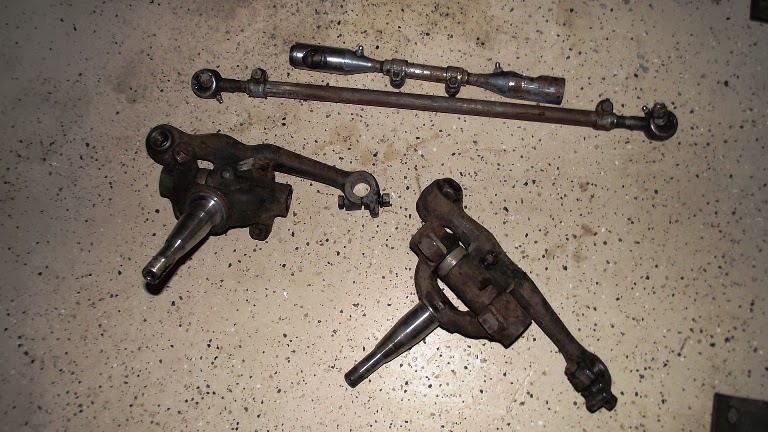
    Once apart I cleaned all of the parts and bagged them. Then I wire brushed the spindle base and spindle support..


   Once this was done I went to work on the cross member with my grinder and wire wheel. I got a good start on that and should be able to finish up tomorrow! I wish I had a sand blaster!


A quick run down of whats left for my benifit ...

Finish cleaning up the cross member
Wire wheel the ...
    A arms
    Springs
    exposed frame rails
    The radiator support
    And anything else I can get to...

Prime and paint all of the parts as well as the frame sections I can get at.
Install the suspension kit from The Filling Station (once it arrives)
Clean and paint the hubs and backing plates.
Have the idler arm rebuilt and install.
Inspect the steering box and rebuild if needed (I hope not!)
Drive it til it breaks!

Tuesday, July 15, 2014

Last of the Additional Weight

    Now that all of the parts have been separated from the cross member it allowed me to get to the places I could not before to remove the layers of crud. I would say there was at least a total of 15 pounds of dirt before I started.


    The worst part was getting in the little cracks and crevices on the cross member! I used a variety of tools to poke, prod and dig the dirt from these spaces.


    Once the heavy stuff was gone I took my pressure washer and went over everything again.


    I still have to remove the spindles from the spindle supports and the upper inner threaded bushings. I took the nut off of the stud on the spindle but I have to read up on how to take the stud out. I assume it comes out? I will play with them tomorrow.


    Washed the drums as well. I will try to have them ready to paint along with the rest of the parts. I have never seen these springs wrapped around drums before. If anyone knows what they are for please post in the comments below. EDIT: I have read that the springs were added to balance the drum to keep the brakes from squealing. And that they also help dissipate heat to reduce brake fade. I don't know how accurate this info is but sounds about right.


    I see that The Filling Station has a pending charge in my bank statement, but for less than the amount ordered. It looks like they are not charging me the cost of the idler arm rebuild and core charge. I never received a confirmation letter from them for my order and my email to them has gone unanswered so far. I am hoping they are just waiting for me to send in the core before they bill me. I will probably call them tomorrow to see whats going on.

Monday, July 14, 2014

Pulled it out, now let's tear it up!

    Started taking it all apart today!

    First I will give credit to Tom Parsons "DZAUTO" on ChevyTalk. I referenced his post on a 57 Corvette rebuild for ideas.

    I used his threaded rod idea for compressing the springs. I am sure I will use other parts of his post throughout the build. You can see his post HERE

    I removed the shocks and associated hardware and inserted the threaded rod. I had to use a piece of flat steel and the lower shock mount to support the bottom. This worked OK but I would prefer a heavy steel or block like used in Tom's post. He does not mention it but the hole at the bottom is so big you have to use something with the threaded rod to hold it all together. My first attempt, I tried the stock lower shock bracket. As I tightened it up I became weary that something would bend or break so I loosened it back up and changed things up. As a quick fix, I drilled a piece of flat steel I had laying around. This piece alone bent as I tightened it up. I took it back off again and added the stock shock mount to firm things up and give more support. This worked fine but if I were doing these often I would make something that would be smaller and stronger to bar the weight of the spring tension.


Once the springs were removed, everything else came off fairly easy. I did have to tap the ratchet on a few of the nuts to help loosen them. I also learned (because I did not read the service manual) that you need to take the large nut off the lower outer bushing first, then remove the bushing. Also on the lower A arms I had to remove one of the rubber seals to allow room for the A arm to slide to one side to slip off. Tom mentions this in his procedure to put it back on ( leave it off and work it through the hole) so it was a no brain'r it had to come off to get it of as well. If these were new parts I would have had to try and work the rubber back through the hole rather than cut it off.


After removing all the parts (except upper inner threaded bushing) I did some more clean up on the cross member. I also sorted the parts I was keeping from the ones getting replaced.


I ordered the parts this morning from The Filling Station so I will clean, prep and paint until they arrive.

Sunday, July 13, 2014

Idler Arm and 16 Bolts, Easy Right?

    I'm got back from vacation Friday evening, Saturday morning I started back on the car.

    I jacked up the front end and supported the car with jack stands. Once secure, I climbed under and removed the idler arm and tie rods. Once I got those out of the way I removed the tires and drums. Then I removed the backing plates as a whole so I did not have to unhook the brake lines. I will also clean up and paint the wheel parts.


    Let me back up for a minute. I did not actually get the idler arm all the way off as the main bolt on top of the cross member would not come all the way out without first lowering the cross member. The engine mount was in the way of removing it. I had debated ion leaving the cross member in but this kind of sealed the deal.


    Now I was 16 bolts away from dropping the whole unit out. This was a major pain. I started by making sure all of the bolts would break loose before actually removing any. One or two on the inside tried to round off but I got them out eventually. It is really hard to get anything but a wrench in the tight spaces. The outer bolts were all loose except the rear passenger side. these where tight, tried to round off and where very hard to get at. It was now 1:00 AM Saturday and I was not going to wait until a nights sleep to reap the rewards of my labor. I put the jack under it and made the last turns to set it free. Dropped it down and slid it out.


    Today I  mainly cleaned some more of the gunk off of it and inspected parts. I picked up some threaded rod to help me compress the springs and I will start taking it apart tomorrow.


It looks like my other shock mount is broken as well. I will either repair or replace this. EDIT: I ordered two new ones and replaced them both.